Total Pageviews

Thursday, December 19, 2013

Moar Miniature Madness! : Land Raider Crusader

Quite some time ago, I purchased a Land Raider Crusader/Redeemer Box from my local hobby store, Hobby Forge. At the time they were still located at the old joint in Cova (they're now located in Kelana Jaya - check with me for further information). Due to severe lack of experience, I essentially made a mess out of things.

Initially I intended to make a Deathwing Vehicle (Bone White anyone?). However, due to my modus operandi at the time, which was to paint EACH PORTION SEPARATELY before assembling the bugger with super duper glue. 

Of course this endeavour was doomed to failed. This method worked for smaller pieces but a Land Raider? Forget it. The truth is, I couldn't even complete the assembly. Out of frustration I collected the parts and I put them in back in the box. I started to focus on other parts of my army (eventually coming up with a wacky drop pod army).

Fast forward to now.

After some discussion with the Hobby Forge Maestro, namely Alvin Khaw, I decided to try salvaging the Land Raider for use in a new Warhammer 40,000 army list.


As you can see from the above picture, although assembly was an ass, I still managed to get it together pretty well. Notice three shades above, Screaming Skull, white spray undercoat and uncoated grey plastic. A rojak if you ever seen one.


I'm always pleasantly surprised at how base paint covers everything well, including dodgy workmanship. I'm using GW's latest line of colour primers. In the picture above, obviously the one I'm using is Caliban Green.


Like a kid in kindergarden, all you have to do now is just fill in the blank spaces with colour and try not to colour outside the lines. Also, it helps tremendously to have a paint scheme in mind. Remember to keep it simple. In the case of painting Space Marines of any kind, less is definitely more. As you can see above, you might want to take the trouble to ensure neat lines and clean painting. Trust me, you'll want to do this.


Side view of the Land Raider Crusader with the decals applied. Thanks to Carl Lum for teaching the proper way to do it. Besides the Dark Angels livery of Caliban Green, you can also make a reference to our Chapter with the Dark Angels, 'Broken Sword' logo.


In the above pic, the Agrax wash is clearly seen, making the shiny metallic parts all gritty. I'm getting rather fond of the drybrush highlight with Ceramite White as well as the weathering with Leadbelcher. I'm aware I am far far away from the decent painters around, but drybrushing is the latest technique I've been using lately to achieve certain worn effects. I hope it turned out ok.


Another side view of the Crusader. The applied decals clearly show that this Land Raider is attached to the Third Company of the Dark Angels Chapter, under the leadership of Company Master Balthasar. This information is most likely irrelevant to all except for the nerds in all of us gamers.

All shots here are taken with the in-built camera of the Samsung Note 3.

For those of you who like statistics:
Vital Stats for December: 2 post 9 pics
Vital Stats So Far: 175 posts 6,342 pics

Disclaimer: The views published in the above photoblog are the author's and the author's alone. If readers are not agreeable with the above views, well, you can bugger-off. All rights are reserved for the the photos and/or articles itself. This article may be reproduced with permission for the author or private or public usage, or other forms of general mayhem. Any unauthorized usage of the images and/or article contained therein is expressly prohibited and violators will be prosecuted with the full force of Malaysian law applicable. Thank you for reading this disclaimer.

Tuesday, December 17, 2013

Moar Miniature Madness! : The Venerable Mortis Dreadnought

Dreadnoughts are mysterious and venerated sarcophagi of fallen Space Marines, entombed forever within an awesome, life-supporting, steel shell, so that the said Space Marine may continue serving the Emperor and his Chapter beyond his broken physical body.


Depending on the Chapter, the respective dreadnoughts may wield a variety of armaments, and which brings us to the Mortis Pattern dreadnought. This awesome block of whoop-ass bears 2 heavy weapons, one on each arm. What makes it even more incredible than that is the fact that the Mortis Pattern dreadnought has skyfire capabilities, making it a mobile platform of awesome. Two Twin-Linked Lascannons to the sky? Flyers be shitting themselves silly.

What is even more mysterious about the Mortis is that it is only used by the Dark Angels and their respective successor chapters. Why this is so, no one know for sure.


Model-wise, the additional arm for the Mortis is not available through regular Games Workshop channels. The Left TL-Lascannon arm is made of resin and ordered through Forgeworld, as opposed to the rest of the model being the plastic Venerable Dreadnought model.


After the primary color were painted in, the entire model was washed with Agrax Earthshade and drybrush highlighted with Warpstone Glow, Ceramite White and Leadbelcher for weathering.

All pictures were shot using the in-built camera of the Samsung Note 3.


For those of you who like statistics:
Vital Stats for December: 1 post 3 pics
Vital Stats So Far: 174 posts 6,336 pics

Disclaimer: The views published in the above photoblog are the author's and the author's alone. If readers are not agreeable with the above views, well, you can bugger-off. All rights are reserved for the the photos and/or articles itself. This article may be reproduced with permission for the author or private or public usage, or other forms of general mayhem. Any unauthorized usage of the images and/or article contained therein is expressly prohibited and violators will be prosecuted with the full force of Malaysian law applicable. Thank you for reading this disclaimer.

Thursday, October 3, 2013

Miniature Madness: Warhammer 40K Painting Re-Booted!

Say hello to Librarian Brother Turmiel, 5th Company of the Dark Angels Chapter.

I started painting this lovely model about a year ago when I first started WH40K. It is supplied together with the Dark Vengeance Starter Set. Fluff-wise, Dark Vengeance is a setting about a series of clashes between the Dark Angels 5th Company and a bunch of traitorous Chaos Space Marines. These plastic models sculpted incredibly in my opinion, along with dynamic poses, which if nicely painted, would make an excellent addition to your Dark Angels army. I say 'Dark Angels' because the models are sculpted specifically for the Unforgiven. Of course, you're welcomed to kit-bash if you like.

After a year, and many, many new things learned, I decided to put all this knowledge to good use and re-paint some of my models. This is the proud result!

In repainting Turmiel, it appears that my brush control has improved tremendously, having cleaner lines and nicer tone than before. I've also started semi-assembling my models prior to base-coating and painting - which has improved my basing by a mile!


Another thing which may not be appreciated immediately, is that I picked up on a lovely technique for highlighting. Previously, I'd draw thin lines on the edges of the model with a lighter, highlight shade, for highlights. Now I use the same shade, but instead of drawing lines, I drybrush it in instead!

Simple? Yes! But it achieves a subtle, gritty glow to the model. The added advantage of drybrushing the highlights is that now I am able to employ a SECOND thinner highlight of white to the model, using the same drybrushing technique. In the case of my librarian, I've layered him with McCragge Blue and highlighted with Lothern Blue.


Another advantage of working with the drybrush technique is that my overall drybrush ability has improved, allowing to drybrush my bases more effectively. Notice the bases here are layered with Mournfang Brown, and drybrushed with Screaming Skull, Trollslayer Orange and a tone of bright Yellow (can't remember what that is called).


More will follow!!! Thanks for reading this!

For those of you who like statistics:
Vital Stats for October: 2 post 19 pics
Vital Stats So Far: 173 posts 6,333 pics

Disclaimer: The views published in the above photoblog are the author's and the author's alone. If readers are not agreeable with the above views, well, you can bugger-off. All rights are reserved for the the photos and/or articles itself. This article may be reproduced with permission for the author or private or public usage, or other forms of general mayhem. Any unauthorized usage of the images and/or article contained therein is expressly prohibited and violators will be prosecuted with the full force of Malaysian law applicable. Thank you for reading this disclaimer.

Tuesday, October 1, 2013

Miniature Madness: Phantom Titan

CREATIVE DIRECTOR & PAINTED BY: CARL LUM

Carl Lum must be a mad genius, for no one else creates dioramas like THIS! You want to paint an Eldar Phantom Titan? No problem. But you want it to stand out? That's an entirely different story. How do you make a Phantom Titan stand out from the other pretenders? Here's how you do it.

Carl, when you get your Golden Demon, I'm taking a picture of that as well.

Firstly, you don't just want a 'mere' Phantom Titan. You want a Titan with ATTITUDE. Beside being painted to a Top-Notch standard, this here Titan has an entire diorama as it's base. It's a magnificent story on its own. Click on the picture for a full-sized shot.


As you can see here, the Titan's right foot is stepping on a Chaos Throne of Skulls - it's Unholy torso ripped by the sheer force of the elegant, well-manicured Eldar Super-Heavy Warmachine. Besides the lovely mess of wires and cables, you should also pay attention to the vats filled with blood (for the Blood God Khorne) at the rear end of the Throne of Skulls. Later there are other shots of the glistening pools of blood!

Besides the Unclean One, in the forefront you can see two Imperial Guardsmen on the floor, one clutching his head in utter terror, and the other hurt and laid out on the ground. More details show damaged Imperial Defence Line, supply boxes on the left and some lasguns on the right.

It doesn't stop there. You can see clearly two Beserkers of Khorne, the one of the left, hurt but roaring in defiance, swinging his power axe, and the one on the right, slain.

Lets not forget the Dire Avenger on the far right, presumably shooting at the obviously furious Beserker. Last but not least, the centre-piece of the diorama, the Exarch leading the assault, backed-up by the Farseer behind him, launching a psychic attack of some sort. Think TopGun - "You can be my wingman anytime.""Bullshit. You can be mine." Click on the picture for a full-sized shot.


Some close up shots of the head of the Titan as well as it's ---- with hand-painted hieroglyphs for added effect. Click on the pictures for a full-sized shot.


The next couple of shots depicts the said Exarch and Farseer in action, with the elegant, well-manicured foot of the Eldar Phantom Titan in the background. Click on the pictures for a full-sized shot.


These next shots are views of the rear of the diorama-base. Here you can see the aforementioned spurt and pooling of blood. One can only imagine what Carl had to go through to achieve this effect. If you look closely, you can also see the mangled remains of another Beserker.

You also can see three Dire Avengers in action, running up and providing fire support for the advancing Eldar army, and generally being all 'Eldar-ry' Click on the pictures for a full-sized shot.


The rear shot of the Eldar Phantom Titan. Click on the picture for a full-sized shot.


Some aerial shots of the diorama-base. Click on the pictures for a full-sized shot.


The Eldar pilot of the Phantom Titan. Click on the pictures for a full-sized shot.


 Some focus on the Eldar Exarch in action. Click on the picture for a full-sized shot.


 Some focus on the Eldar Farseer in action. Click on the picture for a full-sized shot.


For those of you who like statistics:
Vital Stats for October: 1 post 16 pics
Vital Stats So Far: 172 posts 6,330 pics

Disclaimer: The views published in the above photoblog are the author's and the author's alone. If readers are not agreeable with the above views, well, you can bugger-off. All rights are reserved for the the photos and/or articles itself. This article may be reproduced with permission for the author or private or public usage, or other forms of general mayhem. Any unauthorized usage of the images and/or article contained therein is expressly prohibited and violators will be prosecuted with the full force of Malaysian law applicable. Thank you for reading this disclaimer.

Sunday, August 11, 2013

Yashica Electro 35 GTN: Ilford XP2 B&W

My second roll. This time its in B&W. I guess going into film I've always wanted to go black & white.


For those of you who like statistics:
Vital Stats for August: 1 post 15 pics
Vital Stats So Far: 171 posts 6,314 pics

Disclaimer: The views published in the above photoblog are the author's and the author's alone. If readers are not agreeable with the above views, well, you can bugger-off. All rights are reserved for the the photos and/or articles itself. This article may be reproduced with permission for the author or private or public usage, or other forms of general mayhem. Any unauthorized usage of the images and/or article contained therein is expressly prohibited and violators will be prosecuted with the full force of Malaysian law applicable. Thank you for reading this disclaimer.

Tuesday, July 23, 2013

Yashica Electro 35 GTN Black Edition

Photography has been slow for me lately. Between my day job in the office which is picking up, and my night job (Salsa), and Warhammer 40,000, I've been slacking off on the photography. To make matters worse, I'm also getting bored with regular shooting. I needed something to push the Photography Envelope, and I think I found just the right thing.

Say hello to my 'new' Yashica Electro 35 GTN. It's a sexy all-black Rangefinder originating from the 70s.

Throughout this post as well as future posts, I'll be analyzing my own shots as well as learning to shoot classic film better. Welcome to my transition from Digital to Analog. And please enjoy my rants. Try to finish the article mate, it might be interesting for you.

I was told this camera is not made for shots like this. What else could I do? I went out and shot these. I tried to focus on a particular point (lady in white) and waited to catch a decent shot. This turned out OK I guess. Say hello to f/1.7 y'all.

Another dance shot. I don't even remember the settings except for f/1.7!! I think this was a lovely surprise as I think this shot is kinda perfect poster-shot like. I love the grain here. What do you think?

Complimentary sun-flare shot of TTDI. The transition of the flare is very smooth and delightful. Is this a characteristic of film?

Taken from 2nd floor on a sunny, rainy day at f/11. No aesthetic value to this car shot except for the absolute sharpness of the rain-drops and the water puddles on the road.

Tried to capture rain here. Will have to try it again. I think I'll get it right the next time.

The charming Salsero Rushdi, in vintage. Love the texture and bokeh but the focusing here is slightly off. It should be on his face but I think its on his button instead. The wafer-thin f/1.7 shows its teeth here.

Salsera Emily and Salsero Raakesh deep in though, post practice. Bokeh and grain is tops here and focusing this time is spot-on.


Mug-shot of Salsero Choon Ling. Everything is fine here, except for the greenish tint. Wonder why this is so?

Front portrait of Salsera Emily. Standard composition.

A beaming Linnet.
Koon Yik told me that this shot looked like a Hong Kong TVB still. LOL

Milo, life-long brother of ours.

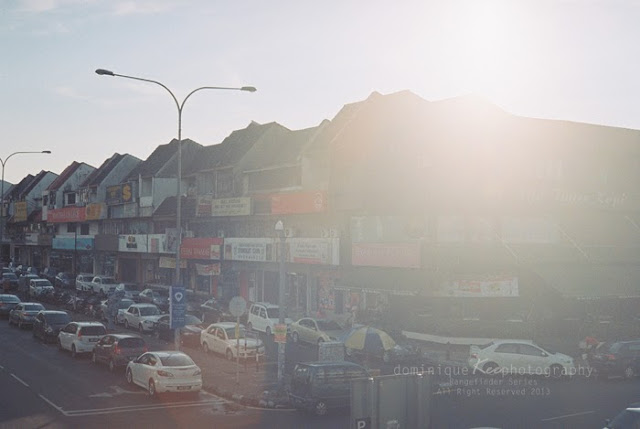
The First Day of 2013's Hazy Period as captured on film.

Steady hands and some stability of feet makes this a great shop.


Raj waiting for food!


For those of you who like statistics:
Vital Stats for July: 1 post 15 pics
Vital Stats So Far: 170 posts 6,289 pics

Disclaimer: The views published in the above photoblog are the author's and the author's alone. If readers are not agreeable with the above views, well, you can bugger-off. All rights are reserved for the the photos and/or articles itself. This article may be reproduced with permission for the author or private or public usage, or other forms of general mayhem. Any unauthorized usage of the images and/or article contained therein is expressly prohibited and violators will be prosecuted with the full force of Malaysian law applicable. Thank you for reading this disclaimer.